The first sign you’re ready to refresh borders is usually a bit uninspiring: tired stems, gaps where plants have died back, and compost that’s sunk so low you can see the top of older roots. If you’re looking at a dull strip of soil and woody clumps, this is the right moment to reset things before growth really gets going.
Start with a simple border “health check”
Before buying anything new, walk the border slowly and really look.
- Cut back and clear: Snip away last year’s dead stems, old flower spikes and any floppy growth lying over emerging shoots. Remove matted leaves, but leave a few tucked around crowns if a cold snap is still possible.
- Check what’s alive: Gently scrape the surface of any doubtful stems with your thumb nail. Green underneath means alive, brown and dry all through is usually dead. Mark gaps where plants have clearly gone.
- Deal with weeds early: Fork out perennial weeds now, roots and all, while the soil is soft. A quick weed at this stage saves a summer of chasing them.
- Lift and edge: Redefine the border edge with a half-moon edger or spade. A clean line instantly makes things look cared for, even before the plants respond.
If this is happening on your border – lots of woody centres with all the growth at the edges – it’s a sign clumps are ready to be divided.
Improve the soil before you add more plants
Healthy soil is the quiet work that makes the rest of the season easier.
Loosen compacted areas with a fork, wiggling it back and forth rather than turning big clods. This protects worms and existing roots but lets in air.
Then add a 3–5 cm layer of garden compost, well-rotted manure or soil improver over the whole border. There’s no need to dig it in; winter wet and spring worms will do most of the mixing. Just avoid piling compost right over the crowns of perennials – leave the growing points visible.
If the border dries out quickly in summer, mix in organic matter around thirsty plants like hydrangeas, roses and large perennials. If it tends to stay soggy, especially after a damp spring, look for blocked drains or compacted paths that are channelling water, and choose plants that tolerate heavier soil.
Before you water anything, check a spade’s depth down. If the soil is still dark and sticky, wait; new plants hate going into cold, wet ground.
Rework your planting: divide, move, then fill gaps
This is the point where many people rush to a garden centre and overfill the border. Use what you already have first.
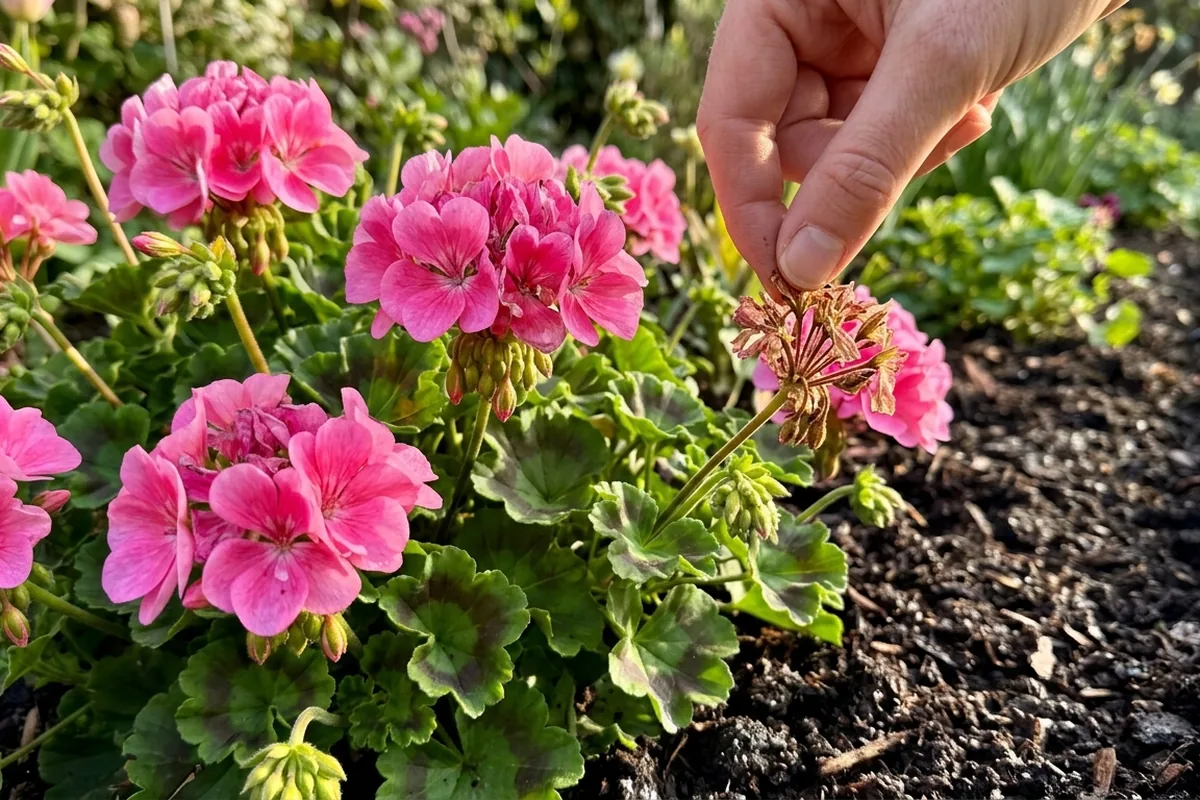
- Divide congested perennials: Lift clumps of things like geraniums, daylilies and hardy asters. Slice them into sections with young, vigorous outer growth and replant at the same depth. Old, woody centres can go on the compost heap if they’re disease-free.
- Move plants to better spots: A sun-lover sulking in shade, or a tall plant hiding at the front, is easier to fix now while growth is small. Water well a day before moving, and again after replanting.
- Plan simple layers: Aim for a backbone of shrubs, a middle layer of perennials, and a front edge of low growers. Even two or three reliable repeat plants can make the border feel organised.
- Add seasonal colour: Tuck in hardy annuals (like nigella or calendula) and bulbs-in-the-green (such as snowdrops) to bridge gaps while shrubs and perennials bulk up.
When you plant, firm gently but properly so there are no air pockets, then water once, thoroughly. If the soil still feels cool and wet a couple of centimetres down the next day, do not water again yet – let roots chase the moisture.
A refreshed border doesn’t need to be perfect. If you clear, feed the soil, reuse strong plants and only then add a few well-chosen newcomers, the whole area will respond quickly. Start with a slow walk along the border this week and make a short list: what to cut, what to move, and where the real gaps are.
Reader note
The Flower Expert is an independent gardening publication. Your support helps us keep creating practical plant care guides for everyday UK readers.
This article was created with the assistance of AI and reviewed by an editor. It is intended as general gardening information, not personalised professional advice.
If you still have a question, or if something looks unclear or inaccurate, you can contact us through our contact form.
If you found this article helpful, please consider sharing it on social media or leaving a comment below with your own experience. It helps other readers too.